Sunday, August 26, 2007
For some reason, I thought, correctly, that 98 was divisible by 14. As I say, correctly. However, my pattern repeat is 8 stitches and 14 rows... 14 rows... 98 is NOT divisible by 8. I didn't discover that until I had finished the ribbing and gotten to row 2 of the pattern repeat. Needless to say, I frogged it. It was only after I'd reknit the ribbing that it occurred to me that I could simply have decreased my first row by 2 stitches and everything would have been just fine.
Oh well. The brain, apparently, was not fully engaged at the time.
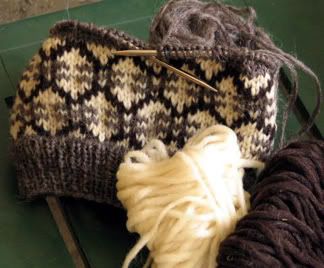
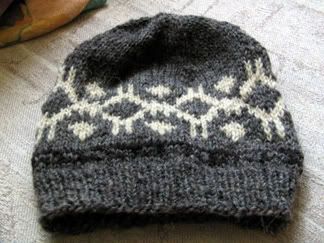
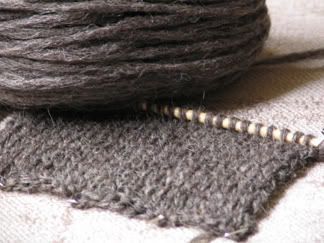
Today, I've been spending some time with yarn and needles in hand and have made good progress on what I'm calling The Fairisle Cap. It's based, once again, on one of Anna Zilboorg's Turkish stitch patterns. She did hers in a pleasing variety of colours; I chose to stay with three colours. Here's where it's at so far...
This one is sized to fit John, or someone with a 23" head. Again, this yarn is knitting up quite nicely and will be a warm and cozy hat for him, or someone, this winter.
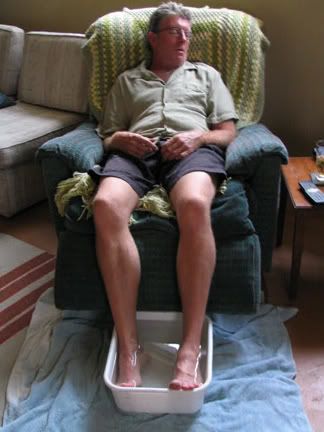
In Chatters last night, at one point I had gotten up to check on John, to see if there was anything I could get for him as he was soaking his feet. This is what I found...
Apparently, he didn't need anything. Fellow Chatters, I said I'd post it. There ya go! ;)
Saturday, August 25, 2007
I Don't Get... really, I don't
Now, I'm in. Do I feel like I've joined an exclusive club of some kind? Nope. Am I impressed with it? Not really.
I've joined two groups, neither of which has had any activity since I introduced myself. One has a total of 8 posts (in one month) and the other has 4 posts (also in one month). Hmm... quiet people or what?
A good number of the knitting books I own have been duly catalogued and are on display (I do like the bookshelves), but what's the purpose? Is it so that other people can see what books you own and ask you for patterns? Or offer to buy books from you? What?
Cataloguing one's stash could be a good idea, but seeing as I regularly fondle my stash, again, why have your stash on public display other than to prove to people you're totally addicted to yarn and we already know that anyway?
In all honesty, I'm rather ambivalent about Ravelry. A place for knitters to get together and compare what they have and what they've done... do we really need that? Like I said, I don't really get why everyone else is so excited about Ravelry.
Oh, I'd post about knitting and what I've done this week, but it seems I've been frogging more than knitting. My knitting time has been very limited this week and nothing has progressed. *sigh*
Sunday, August 19, 2007
No Drooling Allowed
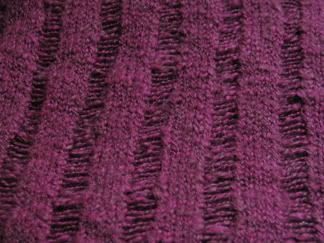
...in all it's purple alpaca scrumptiousness. I finished this one a long time ago, perhaps two years or more ago. It was two houses back, at any rate. We were talking about knitting trends when one of them mentioned Clapotis, and that they wouldn't knit it because everyone else was knitting it, too. Well, I did knit it, but long before all the fuss and bother. The yarn is, I believe, Luxury Yarns, Alpaca Peru, but I could be wrong on that. It is a Luxury yarn, and it is alpaca, and it is cozy and warm and yummy. Putting this shawl around your shoulders truly is like putting on a hug.
Another topic we discussed in Chatters was Ravelry. During the course of the conversation, I went to the Ravelry site to check where I stood on the list. I was surprised to find that I was #72. When I checkd this morning, I'd moved up into the #3 position. So, I suppose I'll be finding out very shortly what all the hype is about. I did discover that at least one of my patterns is either posted on Ravelry or linked to on Ravelry. If it's posted there, I might have reason to be upset. I'm hoping it's just linked. I guess I'll find out soon enough, right?
Saturday, August 18, 2007
Pattern Posted
Now, on to other things. Hmmmm... I'm thinking of making a couple more hats, actually. That was a fun, quick knit; there are a lot more patterns in Anna Zilboorg's book and a lot more of that same yarn. The hats will definitely be warm and cozy enough for just about any kind of winter, I'm thinking.
That's one option. Of course, there are a LOT of UFO's around this house that I really should be working on. Oh, the dilemma!!
Friday, August 17, 2007
Step 3 and the Grand Finale
There! The second chart has been completed. Now, it's time to measure. This turned out to be 6". A previously knit hat had a body of 5" and I found that a bit short for me, so 6" is good. It won't be sliding off my head like the 5" hat might. There is nothing worse on a cold day than having to keep pulling your hat down over your ears when you're trying to hold on to other things, too!
At any rate, the body of the hat is just the right length. Had it been a little shorter, I could have added one more repeat of the first chart, but I don't think it's needed, really. So, it's on to the grand finale.
Remember I said at the beginning that 84 stitches is divisible by 6? Here's where that comes into play. We're going to work the top shaping in six "wedges". 84 stitches divided by 6 sections gives us 14 stitches in each section, right? What we'll be doing is decreasing each of those 14-stitch sections on every other round until we have 42 stiches remaining; that's half of the original 84 stitches. From that point on, we'll decrease on every round until only 6 stitches remain. That will give the top a nice rounded finish. If we were to continue decreasing on every other round, the top would come out somewhat pointed.
In the process of making this hat, I did find one small error in my chart, so I'll have to go back and correct that. Tomorrow, I'll write up the complete pattern and it will be posted to my Freebies page.
Incidentally, it fits me perfectly, is just the right length and, according to John, looks good! I'll try to get him to take a picture of the hat on me so you can see, too.
When writing up a pattern, I use Word for Windows for the written part, then copy and paste it into a template I've made in PageMaker. I know I could do the entire thing in Word, but with the version I have, I can't make a .pdf file; I can with PageMaker.
One more note about this yarn; as stated before, this yarn came without labels of any kind. It's like the White Buffalo yarn, but finer, so I'm thinking it's a worsted weight, which is pretty much what it knit up as. That being the case, any worsted weight yarn may be substituted in this pattern. Just because I used this yarn (whatever it may be) doesn't mean the hat won't work with another yarn. Make sure you check your gauge!
There you have it, the process I go through when designing a pattern. Granted, it's a very simple pattern, not a lot of ripping, tearing and hair-pulling involved. It does, hopefully, show you some of the thinking and planning involved. If you've never tried to design your own hat, sock, or whatever, maybe this will have inspired you just a little bit to try it yourself. All you really need to start is a basic hat pattern that you can customize, either with a fair isle-type pattern or a stitch pattern. Then, just play with it! Have fun!
Tuesday, August 14, 2007
First, a Digression; Then, Step 3
On to step 3.
I've finally decided which stitch patterns I want to use. In going through Anna Zilboorg's book, there were a couple of things I had to keep in mind. First, the stitch multiple has to fit into my stitch count of 84 stitches. Second, the row multiple has to be of a size that will fit onto the body of the hat. In other words, I have to remember that I already have 1.5" of ribbing for the hat band. If I choose a pattern of, oh let's say, 28 rows, with a row gauge of 6 rows per inch, the pattern will be about 4.5". Add that to the 1.5" of cuff and I have a hat body of 7". That's a bit deep for a hat, so the pattern is too big.
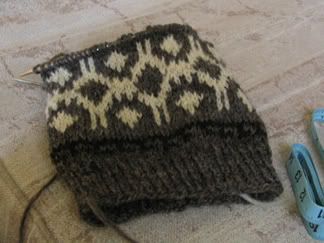
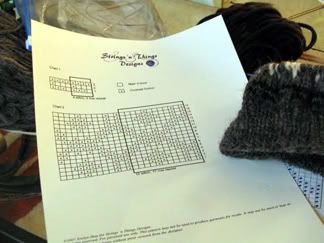
With that in mind, this is what I've chosen...
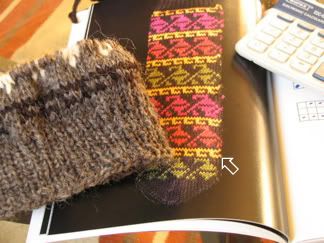
I'll use this one to start with, just to give the hat a bit of balance. This design is a 4 stitch, 3 row repeat, so 1/2". I've put three rows of stocking stitch between this pattern and the main pattern, but I don't think I really needed to.
Monday, August 13, 2007
Step 2
On the larger needles, I got a gauge of 9 stitches and 12 rows to 2". That means I have 4.5 stitches to one inch. I've decided to make this hat to fit an average woman, or about 21". So, how many stitches to cast on? Well, let's see...
21 inches multiplied by 4.5 stitches/inch = 94.5 stitches. We'll subtract 10% because we want the hat to be a little snug, not just fit loosely on the head, right? So, 94.5 x .90 = 85.05. That's not divisible by much of anything, an awkward number, so let's round it down to the nearest multiple of 6. That would be 84 stitches. Why a multiple of 6? Just cuz I like the way the top of the hat comes out when it's done in 6 sections. And, it's a nice even number.
So, now that we have our number of stitches to cast on, we can start. Using the 4.0 mm needles, cast on 84 stitches. Join in the round, being careful not to twist the stitches. Place a marker to mark the beginning of the round and rib (I chose 1x1... or knit 1, purl 1... rib) for about 1.5", or whatever you'd like.
Then, change to the larger (4.5 mm) needle and work 2 rounds in stocking stitch (just knit). Now it's time to start the fair isle patterning. We'll get to that tomorrow, with pictures.
Sunday, August 12, 2007
Swatching and the Process
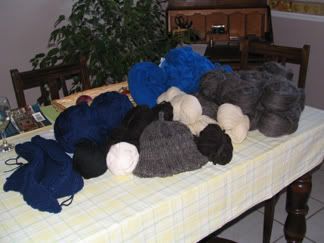
Remember this?
Well, this morning, I decided to dip into this wealth of fibery yumminess and design a cap, either for John or for myself (or just to give away or sell... we'll see).
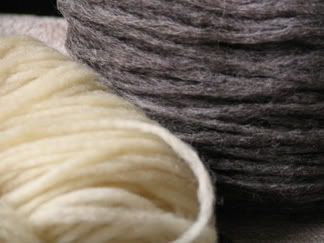
I chose these two colours, and may throw in a little of the dark brown as well. I haven't completely decided that yet. There's also a blue in this same yarn, but I must admit it's not my favourite shade of blue. It's a little too..... blue. You know what I mean? Anyway, I swatched the brown.
I tried to remember what I came up with before; I did swatch this yarn before, using two different sizes of needles, 4.5 mm (US 7) and 5.0 mm (US 8). From what I remember, I preferred the 4.5 mm swatch. It just felt firmer, more stable. This time, I swatched with 4.0 mm (US 6) needles. The resulting gauge is 10 sts to 2" or 5 stitches to the inch. The fabric is quite firm, so I'm thinking that the 4.0 mm will be good for the ribbing on the hat, but I'll have to switch to 4.5 mm for the body of the hat. I think I need to work one more swatch, this time on 4.5 mm needles.
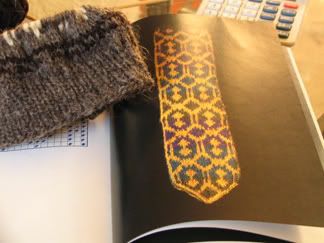
The intention is to use the creamy yarn for a fair isle pattern in the body of the that; the brown yarn will be my main colour. I still haven't decided on a pattern, but I'm thinking I'll find something interesting in Anna Zilboorg's book, "Simply Socks". Her designs are based on Turkish colour work and some of them are quite stunning; there are a number of designs that use just two colours, so I'll probably choose one of those.
I've decided that this will be a hat worked from the lower edge to the top; I like top down hats, but with this yarn, I would need a stretchy cast off and the one I like best is a sewn cast off. Because the yarn breaks VERY easily, I'm not sure that the sewn cast off would work all that well. I think it would cause me more frustration that it would be worth.
So, from the bottom up, two colours, worked on 4.0 mm needles for the cuff and 4.5 mm needles for the body, worked in the round. So far, so good.
Next, I need to decide what size to make it. First, though, I'm going to go swatch on 4.5 mm needles to see what gauge I get for the body. I'll keep you informed.
Monday, August 06, 2007
How about some knitting content?
I did, however, start and finish these...
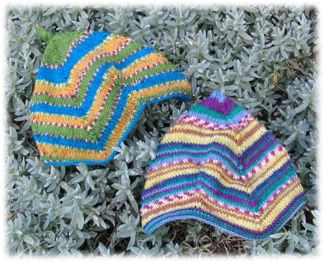
The pattern for these little caps can be found here. Both are made with sock yarn; don't ask which yarns I used because the balls had lost their labels. Both were yarns from the stash that had started out as one thing and became these little hats. They were worked on 2.5 mm and 3.0 mm circulars, with dpn's for the top. The one on the right is the 6 month size and the one on the left is the 1 year size. The pattern also has a 2 year size, which I plan on making as well, at some point. They're a quick knit. I finished off the 6 month hat yesterday morning and knit the entire 1 year hat by 4:00 p.m. I do love projects like that!
Ok, I need to go and get ready for our staff party... on the lake... hopefully the weather stays nice. There are a couple of dark clouds on the horizon. I leave you with a couple of pictures, taken this morning in the back yard.
Sunday, August 05, 2007
But it's not knitting!
You're right; it isn't about the knitting today. Last night, I used up a few of the lovely, vine ripened tomatoes that one of my students gave me (thanks, Jackie!).
The bruschetta was so good that John told me to write up my version of it. Since I had it written up, I decided to share it with you.
Do use the best ingredients you can find. We're getting well into fresh produce around here, so tomatoes, onions, garlic, basil and parsley are abundant and fresh. For this recipe, I used walla walla onion, but any sweet onion will do.
Ev's Bruschetta
2 medium tomatoes, seeded and finely diced
1/2" slice of walla walla onion, finely diced
2 cloves of garlic, minced (or 1 clove if you don't care much for garlic)
4 large basil leaves, chopped finely
1/2 tsp. chopped parsley
1 tablespoon extra virgin olive oil
salt and pepper to taste
Splash of balsamic or red wine vinegar
Mix all the ingredients and refrigerate to allow the flavours to blend. The bruschetta can be served on crackers if desired, but the best way to serve it is to slice up a French baguette, butter the slices, sprinkle with grated parmesan or asiago cheese. Bake the crostinis at 325F or until the cheese is just beginning to brown and the bread is toasted. Top with the bruschetta and serve.
Edited to add: Oops, I forgot one ingredient. To the above mixture, add a splash of balsamic or red wine vinegar.
Enjoy!

