Today, I'm taking a "me" day. Work, at least my share of it, is slow at the moment, so I decided that today would be the perfect day to take off. So far, I've gone through all my old photos and tossed out a lot of them. I'm left with one much smaller box of pictures and I have every intention of going through that box photo by photo. Some I'll scan, some I'll put aside for each of the kids, some will be tossed.
As well, I've made a pan of cream of mushroom soup that turned out spectacularly well. It will become part of dinner (which I have planned.... Crab Stuffed Sole Meuniere, served over rice, with vegetables on the side), as well as some for tomorrow's lunch. Incidentally, the crab stuffed sole recipe is from Foodnetwork.com. I'll let you know how it turns out; it certainly sounded good.
I've also been working on the Ruba'iyat mittens. The second one is coming along very nicely, thank you very much, and here's the picture to prove it. I've also been working on a mitten design of my own. One day, I may even knit it up! I must say that this fairisle/norwegian style mitten knitting and designing is very addictive. Coming up with the designs is almost like colouring is to a child. Fun, fun, fun!

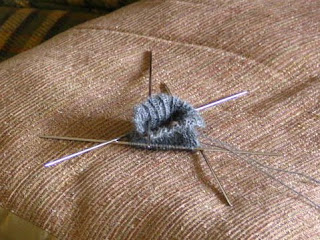
This second picture is a tv-knitting item. I'm not sure how it will turn out, but it is intended to be a wrister, no thumb opening, no fingers, just a tube of knitting to wear around my wrists when I'm on the computer in the mornings. I find that my wrists, especially the right one, gets very cold and achy. Just a cuff of knitting around my wrist helps immensely. The yarn I'm using for this k3, p1 rib wrister is, once again, the JarboGarn laceweight that I love so much. I'm using 2.25 mm dpns, 64 stitches.
While I think of it, Nicola asked where Stacey and her husband got married. It was Mexico. And apparently, it rained the day of their wedding, so it was in a chapel rather than on the beach as originally planned. She did, apparently, get many favourable comments on the dress (that's a good thing!)
I was also asked about the yarn I'm using for the Ruba'iyat mittens. The brown yarn is Louet Gems Pearl and the coloured yarn is Fleece Artist sock yarn. Don't ask me about the colourway, as the tags were lost way back. Both yarns have been living in my stash for at least a couple of years. I must admit, it is nice to have a stash to knit from. :)
Now, it's time to prep for dinner. We won't be eating for a few hours yet, but there's prep work I can do now. Then, I'll have some more time to knit on the mittens. All in all, I'm having a good day!


 I used contrasting yarn on purpose. It makes it easier to see how everything actually knits up. The unspun yarn does show through, giving it a kind of folksy look. From the inside, you can see how the unspun is intertwined with the working yarn. The resulting fabric is quite stiff, but would be very warm and wind resistant.